Install Garage Drainage Channels | IBRAN

One of the most significant and growing risks faced by property owners is that of standing water and flooding. Left unaddressed around your garage, for example, these water issues can lead to structural damage, mould growth, and loss of personal property. One extremely effective way to mitigate this risk is to install a drainage system around your garage. Take a look at this comprehensive guide to properly installing drain channels around garages.
Step 1: Digging the Trench
Begin by digging a trench using a rabbeting or square point spade. The trench should be 18cm wide and 18cm deep to ensure it can effectively handle both the garage drainage channel and concrete fill. Position the trench where water naturally runs off from the garage roof onto the ground. This location ensures that the drainage system will capture the maximum amount of runoff.
Step 2: Positioning the Outlet
You should identify if there is an easily accessible stormwater drain. Ensure that the trench leads and slopes towards this discharge point while adhering to local regulations. It is advisable to consult with local authorities if there are any uncertainties regarding appropriate discharge areas. Without a suitable outlet, the channels will not drain the area.

Step 3: Ensuring Proper Slope
For the drainage system to function correctly, the channels must be slightly angled (5%) towards the discharge point. Use a level to verify the trench’s alignment and adjust as necessary. A proper slope is crucial as it allows water to flow efficiently through the system, preventing stagnation.
Step 4: Preparing the Trench Base
Compact the soil at the bottom of the trench using the back of a shovel or a 4-by-4 piece of timber. This step provides a stable base for the drainage materials. Once compacted, add a 1-to-2-inch layer of concrete to the trench. The concrete layer aids in stabilising the foundation for the plastic drain channel.
Step 5: Measuring Up to Buy Channels
Measure the length of the trench to determine the amount of 1m long drain channels needed. Purchase the appropriate length of channels and number of blanking plates. Drains can be cut to length, provided the vertical outlet remains intact, so always cut from the top of the slope.

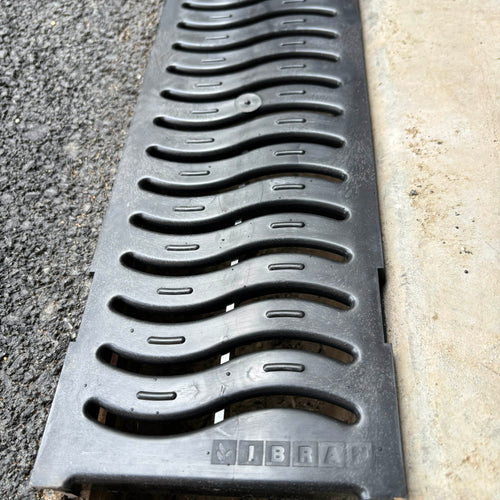
Step 6: Installing the PVC Piping
Place the channels into the trench with the vertical outlet facing down towards and connected to the stormwater drain. Interlock each section of the drains.
Step 7: Back-fill the Trench
Now that your drain channel is placed correctly, make sure to backfill the trench adequately by filling in the gaps around the drains with more concrete. This helps to compress the drain channel, adding strength to it and providing stability to the installation. Leave the grille attached to the gully, so that the shape of the drain doesn’t deform with the weight of the concrete. You may also want to place masking tape over the top of the grilles to prevent the concrete from staining them.
Step 8: Test the flow
Now that your drain channels are in place and properly situated, check that the flow of water is correct by pouring water from the top of the slope. It should flow towards the outlet, without building up in any section. If any adjustments are needed, they should be made whilst the concrete is still workable. You can adjust the slope by gently tapping the top of the drain, through a piece of timber, with a rubber mallet.
Following these steps to effectively install a drainage system around your garage. This proactive measure will protect against water accumulation and flooding, safeguarding the structural integrity of your garage and home, preserving personal belongings.