How to lay gravel grids
How to Lay Gravel Grids: A Comprehensive Guide
Use this comprehensive guide to learn how to install gravel grids on any site. It was written by the founder of industry-leading manufacturer IBRAN. The guide draws on over 10 years of experience developing our product and helping over 100,000 gravel grid installation projects during that time.
This guide provides you with ideas on how to lay a plastic grid driveway on virtually any site.
Follow the steps outlined to create the perfect gravel grid driveway:
Step 1 - Measure Up
- Take Measurements
- Do you need a sub base?
Step 2 - Order the right materials
- Order geotextile for above and below sub base.
- Calculate and order sub base materials for 150mm depth.
- Calculate number of gravel grids by multiplying m2 by 4.
- Order edging components and ramps for installation on concrete.
Step 3 - Prepare the sub base
- Excavate to a minimum of 210mm depth.
- Line the level ground with permeable geotextile.
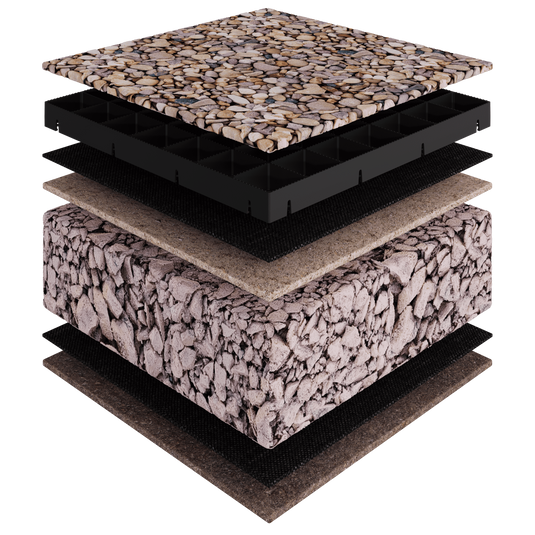
- Fill with 150mm of compacted type 1/2/3 MOT sub base.
- Cover with 10mm levelled sharp sand.
- Line sharp sand with permeable membrane.
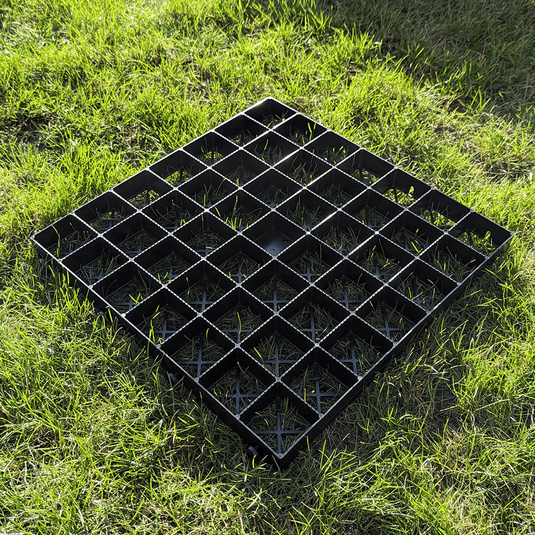
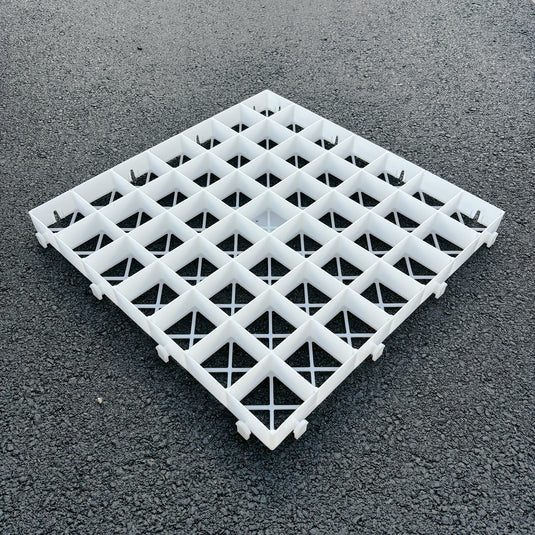
Step 4 - Lay gravel grids
- Connecting the grids.
- Ensuring stability.
Step 5 - Fill with gravel
Step 1 - Measure Up the Site
Accurate measurements are essential for ordering the right amount of materials.
1.1 Taking Measurements
As with any project, it's important to prepare well. This means taking accurate measurements of the area you hope to fit the gravel grids to. Since it's unlikely that your driveway is perfectly square, it might be better to break down the area into a series of square sections from which you can measure.
- Take the length and width of each section to give you the area. Add the sum of these sections together to give you a rough total of the surface area you are laying the grids down on.
- Use our calculatorand make sure to round up your measurements to the nearest 0.5m.
- It's helpful to add 5% to this total to allow for cuts.
- If working in feet and inches, convert your measurements to metric to order the right amount.
1.2 Assessing the Surface
Look at your site carefully. Are you creating a new surface or replacing an existing surface?
Existing surface
If your area already has an existing surface, such as concrete, tarmac, or block paving, consider whether you need to remove that surface or not. If the site is badly broken down, it could be a sign that the sub base beneath is failing or that there are poor drainage issues.
- Are there large breakages in the concrete?
- Does the budget allow for a complete removal of the existing surface?
- How long has the existing surfacing been down?
- What vehicles do you intend to drive over the site?
If your site has poor drainage and you regularly get floods or pools of water building up, consider how you will get rid of this water. Is a surface water drainage solution needed?
New surfaces
If you're starting from scratch, ensuring your gravel grids last a long time requires you to think carefully about the foundation you give them.
- Will vehicles be driving over the grids? If so, what kind of vehicles?
- What kind of soil type do I have? Is it free draining?
When carrying out any surfacing project for motorbikes, cars, vans and trucks, you cannot afford to bypass installing a sub base. It's the foundation that holds up the entire project.
Without a fixed sub base, you're relying on shrinking and expanding soil (particularly clay-based soils) that moves to support something designed to stay still. The grids would slide around between your car tyres and the soil like a bedsheet through a mangle.
If your soil struggles with drainage and gets waterlogged, laying a sub base beneath your grids will aid with the absorption of this water. It creates a permeable layer that allows rainwater to move to the subsoil.
Step 2: Ordering Materials
No project is ready to complete without a list of materials and a schedule of when they're being delivered. Having an idea of delivery dates helps you plan when to start a particular phase of the installation. Having enough materials to complete the project ensures that there are no unnecessary holdups.

2.1 Essential Materials Checklist
When installing gravel grids on a brand-new surface, you need to ensure that the sub base layers are compacted and deep enough to be effective.
- Geotextile for above and below sub base.
- Sub base materials for 150mm depth.
- Gravel grids (calculated by multiplying m2 by 4).
- Edging components and ramps for installation on concrete.
- Weed suppressant membrane.
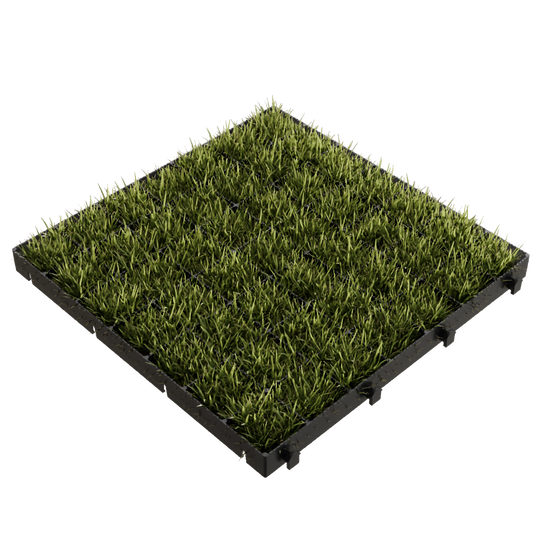
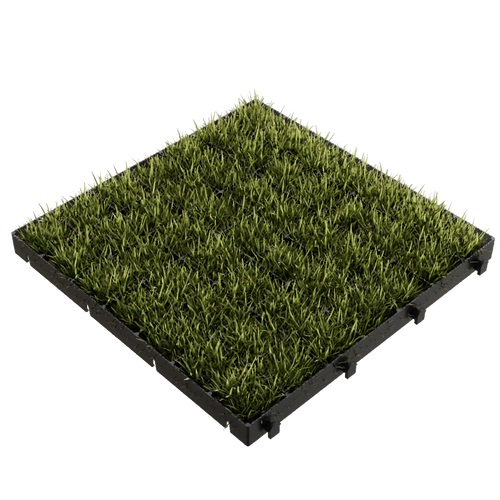
- 50mm depth of 20mm angular gravel.
2.2 Ordering the Right Amount
- Your sub base should be at least 150mm deep when compacted.
- Beneath every good sub base is a permeable geotextile/membrane that allows water to trickle through to the soil below.
- Within the grids, you can put any 10-30mm stone you prefer, but 20mm angular gravel is best.
- Using stone smaller than 10mm may cause it to get stuck in tyres, while stone larger than 30mm can be difficult to fill. Calculating how much of these you need for a 150mm deep sub base is very simple, thanks to these useful tools:


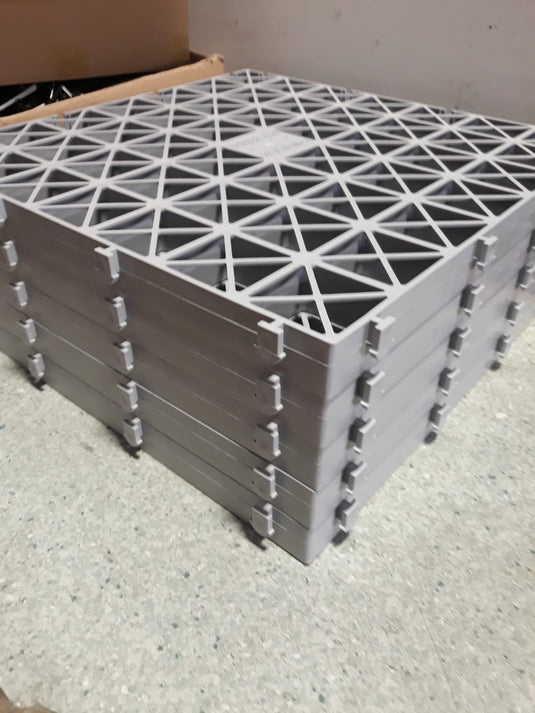
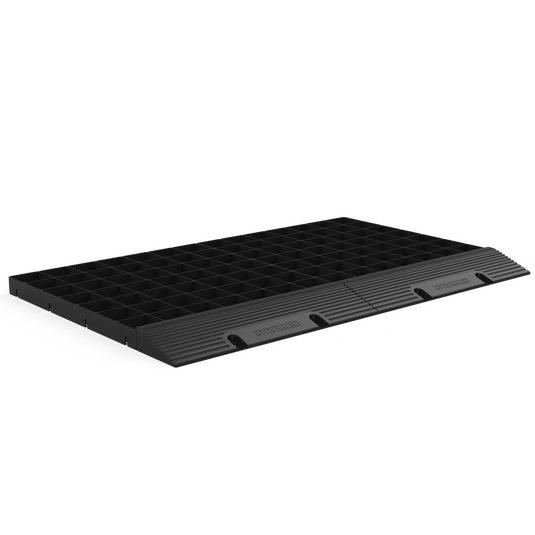
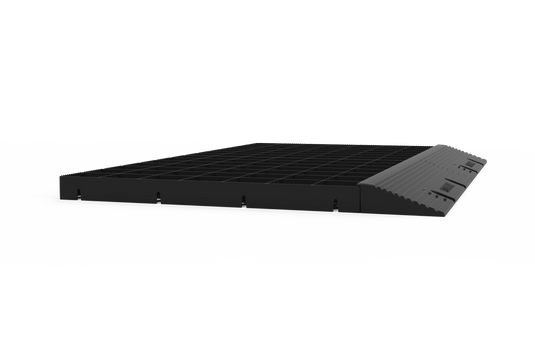
Ordering Gravel Grids
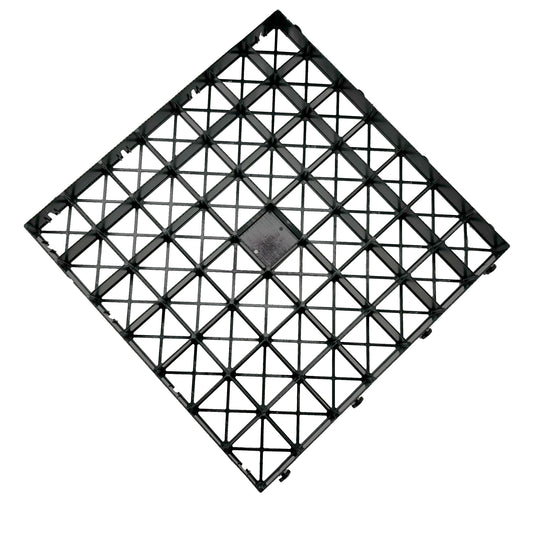
The most important step is ensuring you have enough grids to cover the area you've measured completely.
To do this you'll need to calculate how many IBRAN-X gravel grids your site needs. Fortunately this is as simple as multiplying the area you measured earlier by four.
For example, if your site measures 13m x 6m (78m2), you would need 312 grids.


Additional components
In addition to ordering the membrane, sub base and grids, you might want to consider adding a few components to the installation to ensure that the surface is complete, fully functioning and durable for longer.
These are some of the products worth considering:
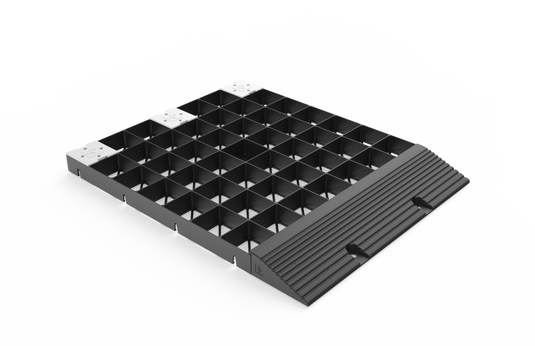
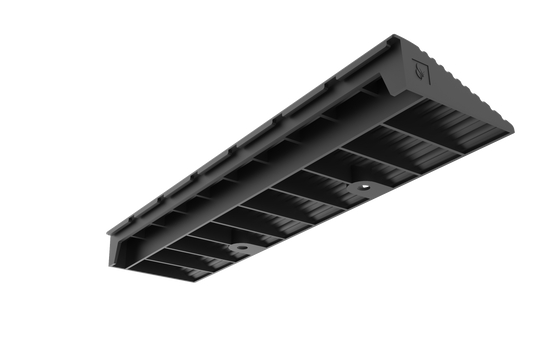
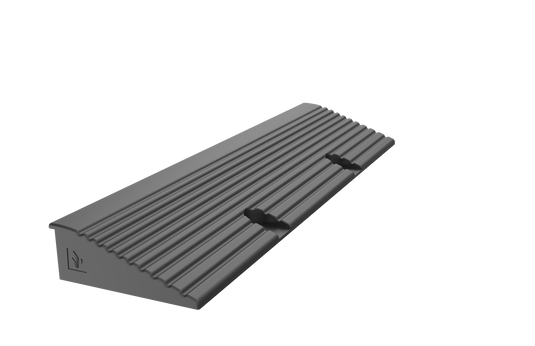
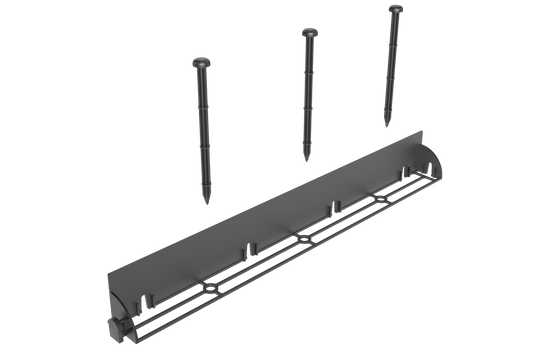
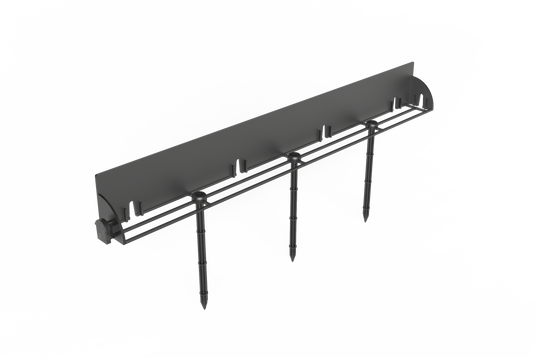
Gravel Grid Ramp Edging
If you've decided to install the grids over an existing surface, you will need edging ramps to ensure that the entrance is protected and anchored. These ramps should be bolted down using 12mm expansion bolts.


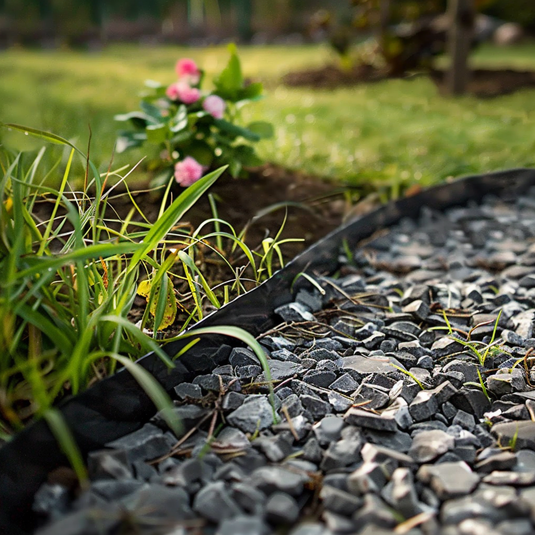
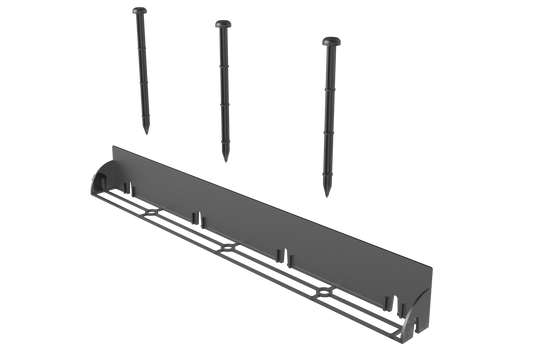
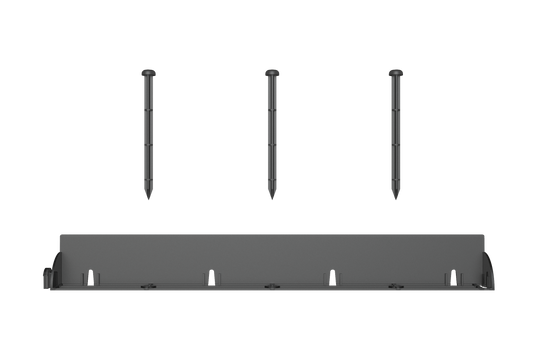
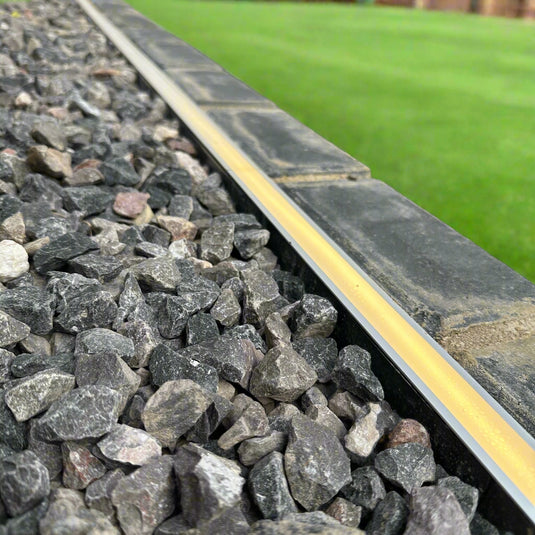
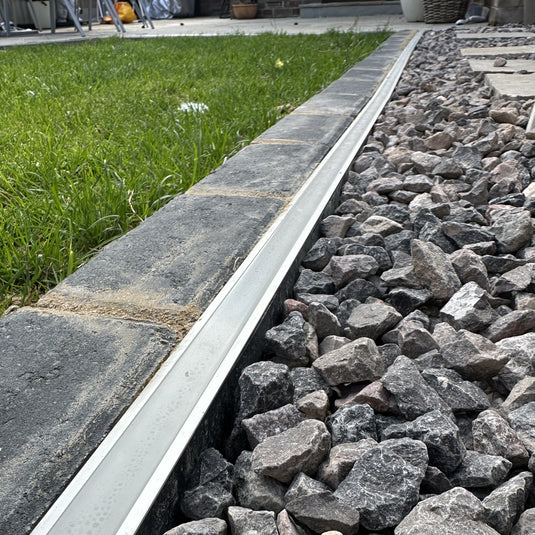
Border Edging
These border edging strips attach directly onto the connectors of the grids, providing a solid division between your gravel surface and adjoining borders and lawns
They can be used to anchor your gravel grid installation on top of an existing surface. They have holes through which you push ground anchors. For installations adjoining grass, the edging strips are packaged with anchor pegs.
Step 3 - Preparing the Sub Base
Now that you have your materials on order and scheduled for delivery, it's time to prepare the site for installation. If you're installing you gravel grids on concrete, you can skip the excavation step of the guide.
Getting your levels right
The key to a good sub base is getting enough material in, compacting it, and ensuring that it is level. Using our sub base calculator our sub base calculator to calculate your total sub base requirements, you have enough type 1, 2, or 3 MOT to create a 150mm deep sub base layer.
During this part of the installation, layer the sub base up 50mm at a time, compacting each layer in turn. It helps to keep the sub base wet and to use a whacker plate/compactor. This wetness helps to bind any fine particles ("fines") in the material, filling in the voids.
3.2 Excavation Depths
- Excavate to a minimum depth of 210mm to allow for the sub base, sand, grids, and stone overfill.
- To save time and effort, consider hiring a mini-digger.
- Grade the surface and line it with a permeable geotextile membrane. This allows water to pass through while preventing the sub base from sinking.
- Fill with 150mm of compacted type 1/2/3 MOT sub base, layering it 50mm at a time and compacting each layer.
- Cover with 10mm levelled sharp sand, spreading it evenly and compacting it to protect the weed suppressant membrane and prevent sub base movement.
- Line the sharp sand with a permeable membrane to minimise weed growth.
- Ensure that the sub base layers are compacted and deep enough to be effective, checking your final level with a spirit level.
3.3 Filling in Any Holes
This step applies only to installations on existing concrete or tarmac surfaces.
Most people choose to replace a concrete or tarmac surface because it is extremely broken and unsightly. Installing gravel grids on top of concrete or tarmac is possible, but you should fill in any holes with type 1 MOT and sand.
Now that your surface is ready, you can start to work on laying gravel grids.
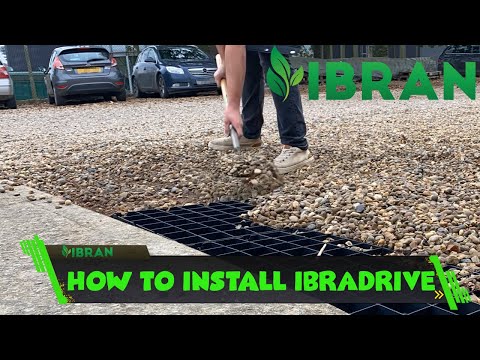
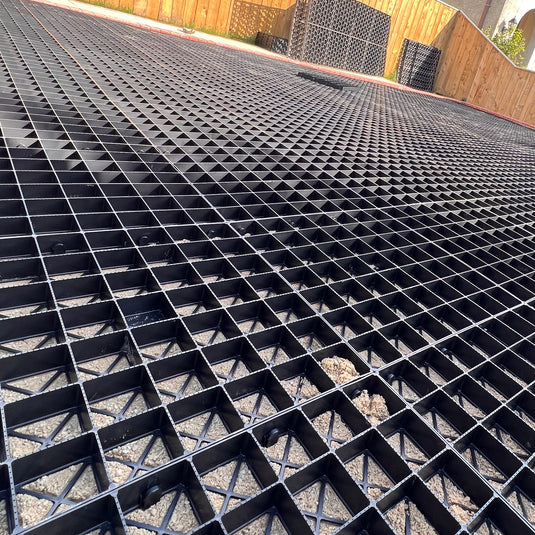
Step 4: Laying Gravel Grids
This is the step where you really start to see the transformation begin. It is a really satisfying process, as the grids quickly connect to one another and form one continuous surface over the membrane, ready for your stone.
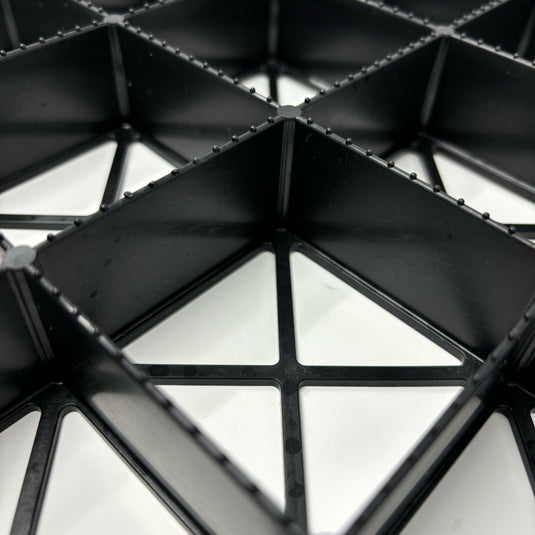
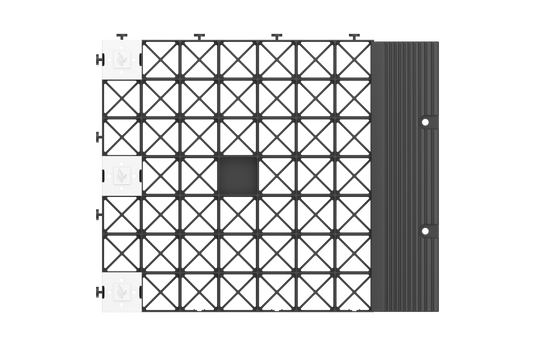
4.1 Connecting the Grids
Orientate all of your grids the same way in the same row. Keep the male connectors on the bottom and right-hand side of the grids as you lay them. Work upwards and back, interlocking one row at a time, pushing the female connectors down onto the male connectors.
When you get to the edges, you may need to cut the grids to fit the shape of the area you're installing within. This can be done with any saw, but a jigsaw is the preferred choice.
4.2 Ensuring Stability
Make sure your edges are well bound into the sides of your area. This tight fit keeps the grids from moving around when driven over. If you're using an edging product, now is the time to use them.
Check over the surfaces and make sure there are no hidden bumps or lumps. The grids need to sit level on the ground.
Step 5: Filling with Stone
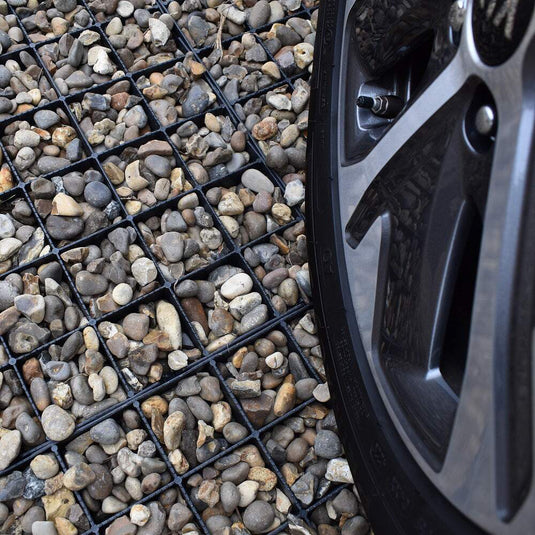
The final stage of your installation is filling in the cells with gravel.
We recommended using 20mm angular gravel but you could just as well fill them with anything that you prefer the look of. 10mm gravel is great for areas without much vehicle use. 30mm gravel works well with areas designed for wheelchair users.
Some installers like to compact the stone within the cells using the whacker plate used for the sub base. This is not necessary, but it does aid compaction at the lower parts of the cells.
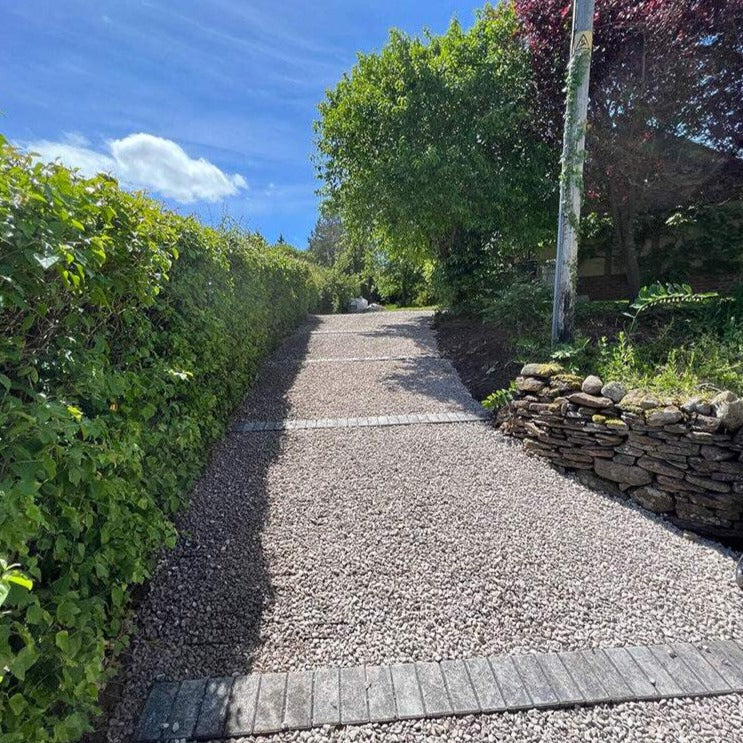
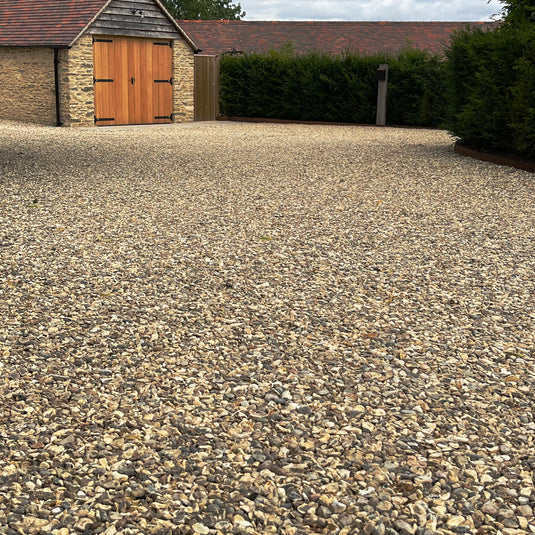
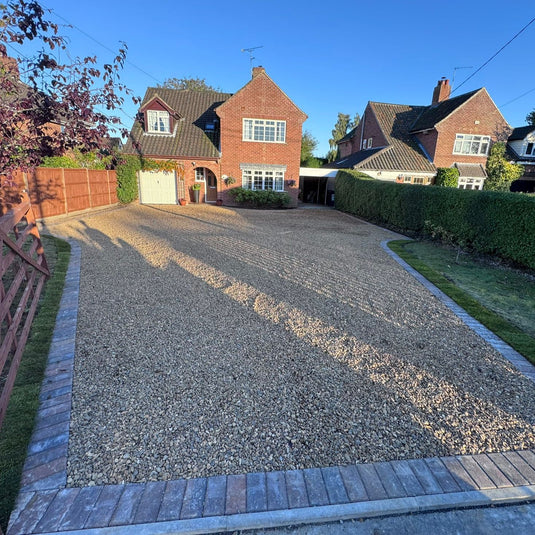
Your gravel driveway is now ready for use!
Remember, IBRAN-X is the only system designed to help you install your gravel grids on virtually any site.
Final Checks and Maintenance Tips
- Ensure all grids are level and tightly connected.
- Apply additional gravel over time to maintain coverage.
- Monitor drainage and replenish gravel as necessary.
Installation Video
Video Installation Guide
Our installation guide can be found on YouTube as a watch-along guide.
Watch on YouTube