Installing a patio drainage system to an existing patio

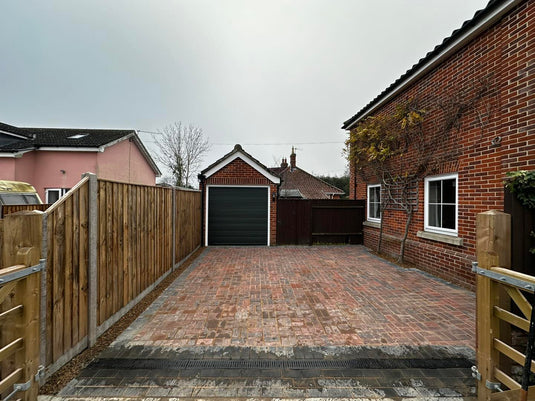
With changing seasons bringing ever more rain, your patio might have started to resemble a garden pond. Instead of enhancing your outdoor living space, it's providing a harrowing reminder of just how grey the sky can be. Worse still, the standing water might be coming into contact with your home! Your patio should be the perfect spot for relaxation and entertainment.
Proper drainage was never really considered when the patio was laid. But it is essential to prevent water from pooling and causing damage to your patio, surrounding areas and even your home.
Fortunately retro-fitting a drainage system isn't a massive, daunting task. In this comprehensive guide, we'll walk you through the step-by-step process of installing patio drainage channels like a pro.
Assess Your Patio Area
Before you begin the installation process, it's important to take a look at your patio to find any low spots or areas where rainwater tends to build. Check the levels of your patio with a spirit level to see if there are any slopes. If you have large puddles in the middle of your patio, you may need to adjust the surfacing. If that's difficult to achieve, you may need to install the patio drainage channels across these lower areas.
Choose the Right Drainage Channels
There are lots of different types of drain channels to choose from. There are 4 main classes relating to the weight bearing. Don't panic about all of this - the only class you need to really think about when retrofitting or fitting patio drain channels is the A15 class.
There are also two depths to choose from - shallow and standard. As the names suggest, they provide your patio with different capacities for volumes of water. The trade off between shallow and standard is the amount of digging you have to do vs the amount of drainage your channels can provide. If you can go deeper with your excavation, the benefits of spare capacity can be enormous when the rain comes down hard.
Prepare the Installation Area
Once you've chosen which drainage channels you want to use, it's time to prepare the installation area. Clear the patio surface of any debris, vegetation or obstacles that may block progress. Use a tape measure, string line and chalk to mark the layout of the drainage channels on the patio surface.
Get digging!
With the layout marked out, proceed to dig out the trench ready for the drainage channels. Use a shovel or trenching tool to dig a trench along the marked lines to the desired depth and width. Ensure that the trench slopes towards the stormwater drain.
Install the Drainage Channels
With the trench dug out, it's time to install the drainage channels. Begin by filling the trench with enough concrete for the drains to have good contact with it and still be at the right height. Push the channels down into the concrete, ensuring you maintain a 5% slope towards the stormwater drain. Connect multiple channel sections as needed to cover the entire length of the trench.
Secure the Channels
Ensure that the channels are firmly anchored, no higher than the patio surface to prevent tripping hazards and maintain a seamless appearance.
Test the Drainage System
Before signing off on the installation, you need to test the drainage system to be sure the drains are directing the water away correctly. Pour water into the channels or use a hose to simulate rainfall and see which way the water flows. Check for any connection issues, obstructions or areas where water may not be draining correctly and make any necessary adjustments.
Backfill and Finish
Once the drainage system has been tested and approved, backfill the trench more concrete to provide support and stability to the channels. Ensure that the concrete is in good contact with the drain channel, creating a solid support for the drain channel. Finally cover any exposed gaps with an appropriate surfacing.
Maintenance and Care
Regular maintenance is essential to keep your patio drainage channels in optimal condition. Clean the channels periodically to remove debris, leaves, and other obstructions that may obstruct water flow. Inspect the channels for any signs of damage or wear and make repairs as needed to prevent potential drainage issues.
Conclusion
Installing patio drainage channels is a practical and effective solution for managing water runoff and preserving the integrity of your patio. By following this step-by-step guide, you will benefit from proper installation and long-term functionality of your patio drainage system. With a well-designed and properly installed drainage system, you can enjoy your patio year-round without worrying about water damage or drainage issues.
Remember, if you're unsure about any aspect of the installation process, it's always best to consult with a professional landscaper or drainage specialist to ensure the job is done correctly. With the right drainage solution in place, you can enjoy a beautiful and functional patio for years to come.