Laying a Sub Base: What You Need to Know | IBRAN

A sub base will give you solid foundations for any type of surface, including your new patio, driveway or footpath. The key to any good sub base is getting the right material choice and thorough installation. A sub-base works by spreading a point load over a larger area. The interlocking of particles in the sub-base material means that even a thin layer of the right crushed aggregate can greatly enhance the ground's ability to support heavy loads.
Laying a sub base steps:
1. Sourcing materials
Choosing the right material for your site is fundamental to your project, as you want to be sure the quantity, type and function of the sub base material supports the project you want it to support.
A lot of the cost of any surfacing project comes from the foundation material (the “sub base”) and whilst there are cheaper materials, the cheapest sub base is one that lasts and supports your project for the longest. You can use compacted concrete as a sub base but MOT sub bases are generally considered the cheapest sub base materials. They are also an excellent choice for your driveway sub base.
What is MOT sub base and what does it do?
There are three types of MOT sub bases, each with differing properties and benefits to your project.
Type 1 MOT:
Generally, recycled MOT Type 1 aggregate is cheaper, though it may include bits of wood, plastic, glass, or metal since it's a byproduct of demolition.
Type 1 MOT generally binds well whilst it also has good drainage properties, making it suitable for sites with fine, well-draining soil.
Type 2 MOT:
MOT Type 2 is a rougher sub-base material used when a thicker base layer is needed.
Type 2 is a slightly more free-draining material, making it suitable for most projects.
Type 3 MOT:
Type 3 sub-base is made from pure crushed granite, limestone, or clean crushed concrete, usually in 40mm pieces, screened to minimise fine particles.
Type 3 is the best choice for sites with heavy/dense clay soil and poor drainage where it’s very important for water to pass through the sub base quickly.
How much sub base do you need for a driveway?
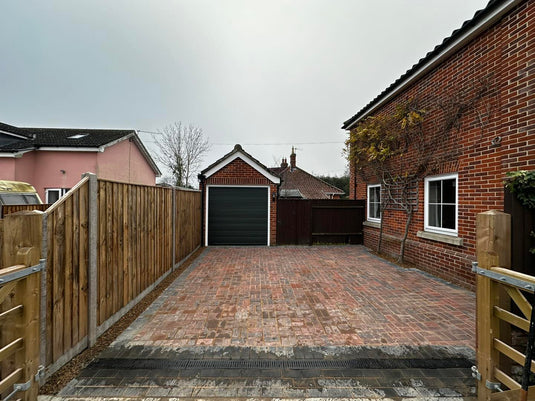
Whilst for patios and footpaths you should aim for a minimum of 75mm of sub base, for domestic driveways with heavier vehicular use, we recommend a minimum of 150mm of sub base. We’ve seen many driveway projects fail after a year or even a few months due to not getting the depths of sub base right. To help you calculate how much sub base to buy, we’ve put together a simple sub base calculator.
Even a 150mm sub-base has impressive load-bearing capacity. Just a few centimetres of the right material, properly compacted, can transform a weak, rut-prone surface into one that can handle cars and other vehicles. This is done through "load spreading", where the granular material distributes point loads over a much wider area, allowing significant weights to be supported without settling or distorting.
2. Marking out and Excavation
Using a string line to mark out your boundaries, you can start to excavate the area for your new driveway or patio. For larger projects, we normally recommend using a mini digger to help aid and speed up the process. Keep within the string line to ensure your edges are straight and size remains consistent with your measurements.
The bottom of the excavation needs to be level and free of debris and lumps. This will aid compaction and levelling later.
3. Laying MOT sub base & compaction
Under your sub base, you should line the ground with a permeable geotextile. This ensures that the sub base does not migrate into the soil beneath whilst also allowing water to pass through unimpeded. It’s not best practice to lay any type of sub base on soil directly as the movement of the wet ground undermines the stability of the sub base and the surfacing.
Depending on the total depth of your sub base, which for patios should be at least 75mm and for driveways at least 150mm, you will want to add your sub base material in layers. For patios, add your material in layers of 25mm at a time and for driveways, add your material in layers of 50mm at a time.
You should wet your sub base enough to aid compaction and bind the material together. A moisture level of about 8-13% helps you achieve maximum compaction. Less means the material won’t bind and more will hurt it as well.
Practically speaking this is hard to measure and no one has ever taken a moisture probe to measure a sub base! The only way to gauge this is visually. If it looks the same as when it came out of the bag, add more water and if it is extremely sticky, you’ll need to wait for it to dry out slightly.
With any sub base of any depth, the key is in its compaction. This is done with a compactor/wacker plate passed across the surface of each layer in both directions.
To aid drainage, particularly in the case of patios and driveways, make sure there is a fall in the direction away from your property or towards a drain. This ensures that when you come to surface the area, any surface water clears quickly. The fall should roughly be 1.5% or 15mm in every 1m.
4. Sand blinding the sub base
This step is particularly important for solid surfacing and gravel grid installations as it ensures the surface is levelled ready. The standard advice we offer is to layer compacted sharp sand to a depth of 10mm over the top of the sub base. A long, flat screeding pole or even a straight edged piece of timber will help you get the sand level over which you can lay your membrane and surfacing material.
For more help with calculations, we’ve put together a sand calculator tool which helps you to work out quantities of sand to order for any surfacing project.
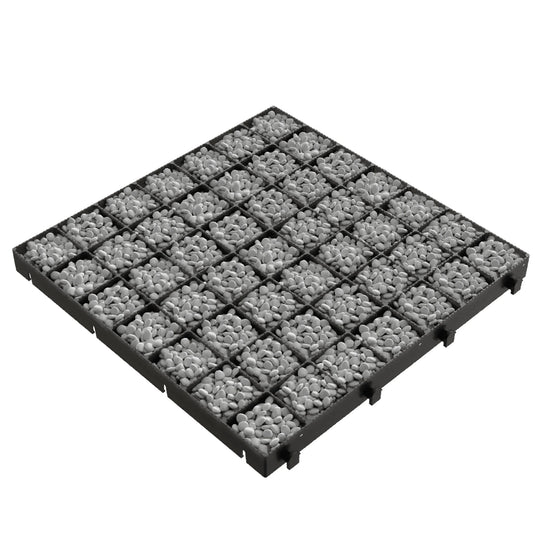
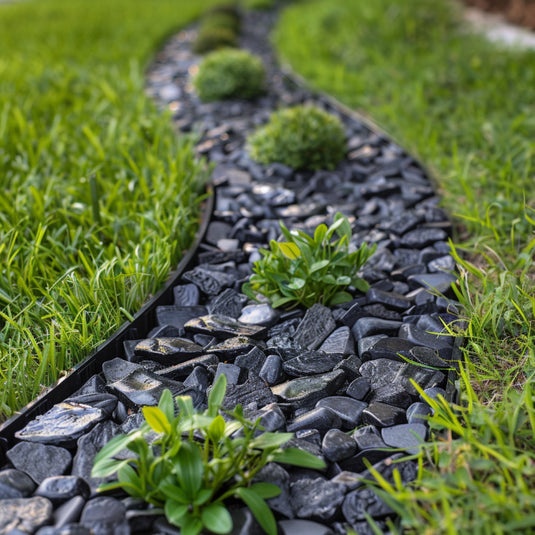
More info on installing surfacing can be found throughout our site, including how to install the IBRAN-X gravel grid system for a fully permeable, customisable surface.