How to Pave a Steep Driveway | IBRAN

Is your next project to tackle surfacing a sloped driveway?
What is a good slope for driveways? What surfacing option is best for a sloped driveway? Luckily we've got a few solutions for surfacing your sloped driveway, including tackling some of the tricky aspects of drainage.
Follow these simple steps to create a free-draining, functional sloped driveway:
- Step 1 - Measure the gradient of your slope
- Step 2 - Measure the total area of your driveway
- Step 3 - Decide upon the right surface type
- Step 4 - Order materials
- Step 5 - Install your new driveway surface
Step 1 - Measuring the gradient of your slope
Before you delve any deeper, you need to know what kind of slope you're dealing with and how steep it is. This gives you the basis from which you can make your decisions.
To measure the gradient of any slope in practical terms, you need to measure the change in height across a given length. You can use a staked string line, a tape measure and a spirit level for this. Use these tools to find out
- A - How long is the driveway as the crow flies? This is your "run".
- B - How high is the drop? This is your "rise".
Stake your string line in at ground level at the top of your slope and drive a high stake, at 90º to the Earth, in at the bottom of your slope. Run the string between the two stakes and use the spirit level to ensure that the string is sitting level.
Once you have the string line level, measure how long that string is between the two stakes (A). Also measure how high the string is from the ground at the bottom of the slope (B).
Gradients/slopes are calculated based on the change in height/elevation across a horizontal length. They can be expressed as a percentage or in degrees.
To calculate the slope expressed as a percentage (%), use this calculation:
Change in Height (m) / Length (m) x 100% = Gradient (%)
To save having to do these calculations yourself, you could use our Gradient Calculator.
Using our practical example of how to measure, if your string is 1m up your stake (B) at the bottom of the slope and your string is 10m long from stake to stake (A), the calculations would look like this:
- 1m / 10m x 100% = 10%
- ArcTan(1m/10m) = 5.71º
If you want to speed things up, you might prefer to use our gradient calculator.
Step 2 - Measure the total area of your driveway
It's very rare that any driveway is perfectly square. Sometimes it's more helpful to measure different sections individually. Take the length and width of each section individually, multiplying them together to give the area of each section. It's often more helpful these days to keep your measurements in square meters as a lot of suppliers now work out their calculations according to the metric system.
Keep a record of these numbers as you'll need them later on for ordering materials.
Step 3 - Decide upon the right surface type
Multiple factors determine which surfacing option you ought to use on your driveway including budget, drainage and the gradient you calculated earlier.
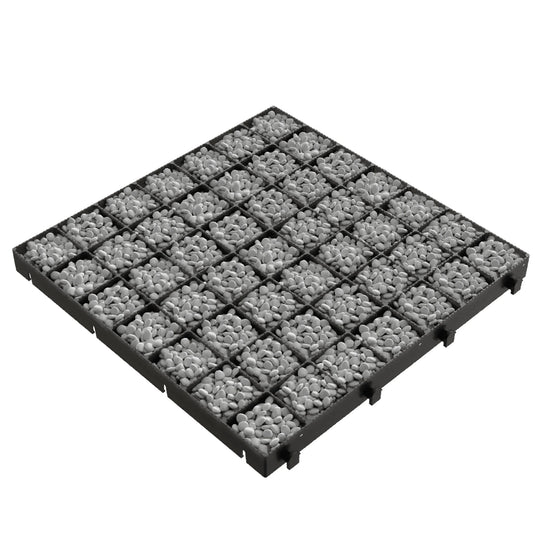
In the case of budget, it helps to understand what the different surfacing options cost. You can install gravel grids on a slope if your gradient is less than 25% (14.04º) or less. Gravel grids are the cheapest surfacing option and they also offer the best drainage option of all.
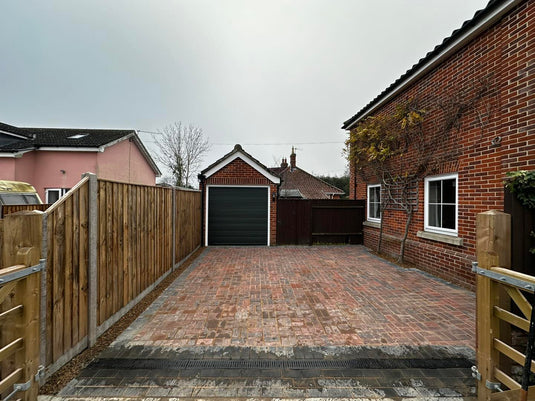
With anything steeper, you will better served by a bound material such as a resin bonded surface, tarmac/asphalt, concrete or block. These options are more expensive and will need to be installed in conjunction with a channel drainage solution to gather and drain the surface water. If the total area of the new surface is over 50m2, then you'll also need to seek planning permission from the local authority to install non-porous surfaces such as tarmac or concrete.
Step 4 - Ordering materials
Having measured the different sections of your driveway earlier, you now know what area needs to be covered and all that's left is to order the right amount of materials.
Does your new driveway need a completely new sub base? Use our sub base calculator and sand calculator to get your depths and quantities right. And read our guide to laying a sub base to be sure of the process.
Order the right amount of surfacing - whether that's grids, tarmac, resin, etc. - to cover the sum of all the areas put together. Adding 5% extra to the total covers all cuts, adjustments and other unforeseen circumstances.
Step 5 - Install your new driveway surface
All that's left to do is to excavate, lay your sub base and surface with your chosen material. Whichever surfacing option you've decided upon, it's always a good idea to follow the guides provided by the manufacturer or supplier. Good suppliers always want the products they've sold to perform well and will put together in depth guides to help you achieve that high performance.
Our gravel grids can be installed on slopes up to 25% and the installation process is exactly the same as on level ground.
Stewart McMichan's recent example
Stewart McMichan recently sent us these photos of his latest construction. Using a type 1 MOT sub base, lined top and bottom with geotextile membrane, our gravel grids were secured on top and cut to the desired length and width. This ensured that the 20mm golden gravel remains firmly in place and the draining still continues.
As each grid has anti-slip nodules on the top surface, which provide additional grip for icy weather conditions. Perfect for Stewart's motorbike, car and camper van!

Compared to other surfaces, the overall cost of laying a grid-bound gravel driveway is quite affordable. Please get in contact with us if you wish to discuss your ideas in detail.